
A Syntropic Garden is a regenerative food production system that mimics nature, growing vegetables and other crops amongst trees on a small plot of land, usually less than an acre.
It is based on the Core Principles from Syntropic Agroforestry and draws from many other natural farming techniques and practices.
This combination helps it achieve its primary aim of natural succession, evolving from market garden to self-sustaining food forest over time.
In this article, you will learn how to create a simple Syntropic Garden in your backyard. Once you understand the basics, let your imagination go wild.
Let’s dive in!
Before You Get Started…
Here is a list of equipment and materials you will need for this project. Chances are, you already have most of the tools lying around your home.
| Items | Details |
| Plot of Land | Well lit with access to water, preferably close to your home. |
| Garden Fork | Light and durable, suited for your height. |
| Shovel | Doesn’t matter if it is flat or curved. |
| Machete (Cutlass) | This will be your primary tool for years to come. |
| Tape Measure | It should be at least 14 feet long. |
| Planting Material | Seeds, seedlings, cuttings, etc. |
| Compost | Homemade is best, but store-bought works. |
| Mulch | Grass clipping, shredded leaves, or other organic material. |
| Watering Can or Hose | To wet areas after planting. |
| Spray Paint or Chalk Powder (Optional) | Only required for marking large projects. |
| Drawing Material or App | Paper, pencils, design software, etc. |
Now that you have an idea of what you’ll need, make a note of all the available resources, including the size of land, planting material, mulching material, etc.
With this information in hand, you are ready to move onto…
Step 1. Choose And Assess Location
The first thing you need to do is get a clear idea of the area you intend to set up your garden.
Take a walk around your property, identify the site, and note any obstructions; large boulders, trees, and utility wires.
Measure the entire length and width of the plot. You can use your tape measure to do this, making a note of the position of any trees you would like to keep.
If the area is too overgrown, you may need to clear some vegetation to get a better view.
Note any potential obstacles, e.g., soggy patches, steep terrain, rocky soil, etc.
Note: At this point, you may wish to take some pictures for reference; these can also serve as your "before shots'' in the future.
Step 2. Choose Plants For Your Consortium
Now that you have an idea of the space you have to work with, it is time to list the plants you would like to grow over time.
You can include vegetables, fruit trees, and even edible flowers. Don’t worry too much about the size of the land at this point.
After completing your list, you will need to research and group your plants based on their expected time within the system (succession) and their light needs (stratum).
Here is an example of a completed consortium design.
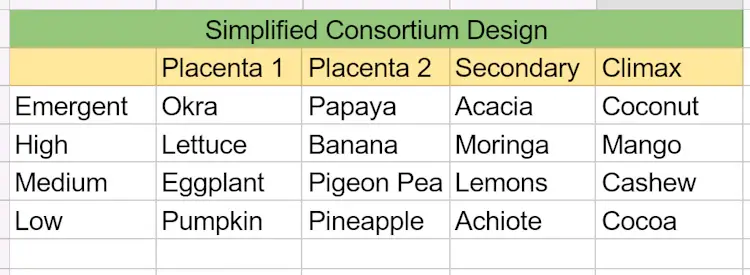
While working on your consortium, take note of the spacing between trees of the same stratum and those from different stratification levels.
Note: You can take a look at Syntropic Farming Basics: Plant Spacing And Consortium Design for more information.
Step 3. Design Your Syntropic Garden
At this point, you can get a bit creative. However, there are some pointers you should keep in mind.
- If possible, rows should be planted in a north-south orientation to maximize sunlight exposure to all plants.
In cases where this is not possible, increase the space between trees to avoid creating walls of shadow.
- Ideally, each section should be three beds; a tree row, a crop row, and a biomass plant row.
However, if space is limited, you can remove the crop row and intercrop vegetables in the tree row.
With these two pointers in mind, it is time to design your garden.
Note: You can use a software application such as Garden Planner or Shoot. However, a notepad and pencil will do the trick.
Follow the steps below to create a simple layout design.
- Draw the basic shape of the plot using the measurement taken earlier.
If you intend for your garden to fill your entire backyard, you can use your land plan for reference.
- Mark out the sections. Each section should include a 48″ wide tree row, crop row, and biomass plant row, separated by 18″ walkways.
Do you remember what you have to do if space is limited?
- Use the information you gathered while creating your consortium design to map the location of the trees in the row.
You can use basic shapes to represent stratum or specific trees, a method I borrowed from the Palekar Five Layer Model.
In a Syntropic Garden, function comes first. Once you have completed the basic layout design, you can get creative by accenting the garden with pathways, borders, and other decorative features.
Step 4. Prepare The Planting Area
It is time to do some earthwork, the foundation of your entire design.
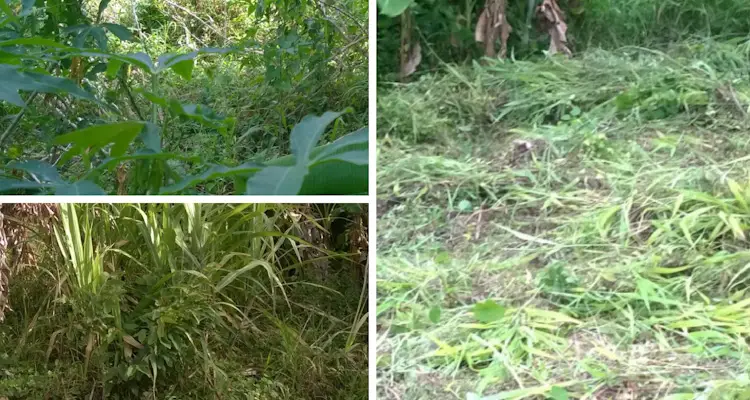
Clear away all unnecessary vegetation. Prune any fruit or ornament trees you wish to keep. Move all trimming to the side; you will be using some of these later.
Mark out the beds and pathways. If you are on a steep slope, you will need to do this along contours.
For detailed instruction on creating beds on relatively steep slopes, you can view our article 9 Proven Tips To Prepare Land For Terrace Farming.
Afterward, you are going to reset the soil. You can use your garden fork or a small tilling machine to turn the dirt over, breaking it into smaller clumps.
You only need to do this once, so don’t worry too much about disturbing soil life or structure.

Shape your bed rows and pathways. Use your shovel to remove soil to create your paths. Place the excess dirt onto the beds, increasing the height slightly.
Your beds should be about 48″ wide and 6″ raised, with gently sloping sides. The pathways should be about 18″, wider if space permits.
Do not worry if the shape is not perfect. It will change slightly as the soil settles and is exposed to the elements.
Apply compost and other microbial inoculants to the beds. You can choose to purchase a well-balanced, microbe-rich compost or compost tea from a local provider, or you can make your own.
If you are in doubt, you can make your own solution.
For detailed instruction on being your own microbe solution at home, you can read How To Make JADAM Microorganism Solution.
Cover the area with organic mulching material. You can use just about anything as mulch, e.g., compost, dried leaves, wood chips, newly cut vegetation, etc.
However, if you intend to grow leafy vegetables or shorter crops, avoid large mulching materials since they can be a bit difficult to work with at this point.
Wet the entire area. You should give the whole place a good soaking at this point if there is no rain.
You can use this time to apply compost tea or other microorganism solutions.
After some days of this treatment, you will notice that the soil under the mulch remains moist. It is now time to start planting.
Step 5. Plant Biomass Plant Rows
Plant a combination of grasses such as vetiver, plants such as comfrey, or even shrubs such as pigeon peas. These plants regrow after being cut repeatedly.
If none of these are available, you can purchase some annual cover crop seeds from your local agriculture store and broadcast them over this bed.
You can also leave this as-is for a week or two and allow nature to fill it in with wild grasses and flowers for you. However, you will need to ensure that the soil is kept covered by a thin layer of mulch as you wait.
The biomass plant row aims to grow plants solely to produce organic matter to feed your garden.
This row is easy to plant since you do not have to put much thought into the spacing.
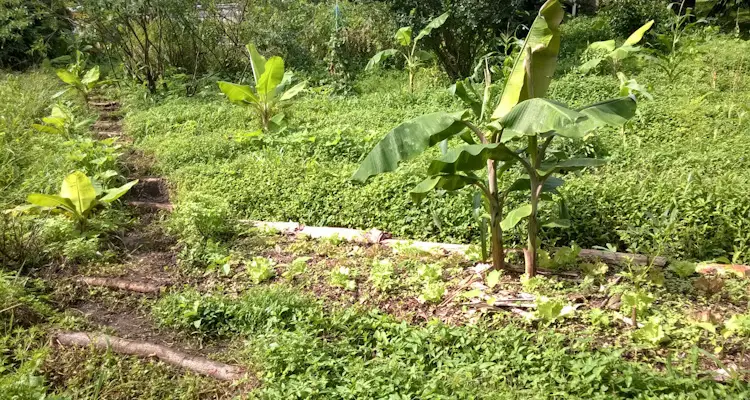
Step 6. Plant Trees Rows
Place a marker every 10 feet (3 meters) at the center of the tree row. This will guide, making it easier to transfer the spacing from the design into the garden.
Plant the seedlings, spacing them according to your design.
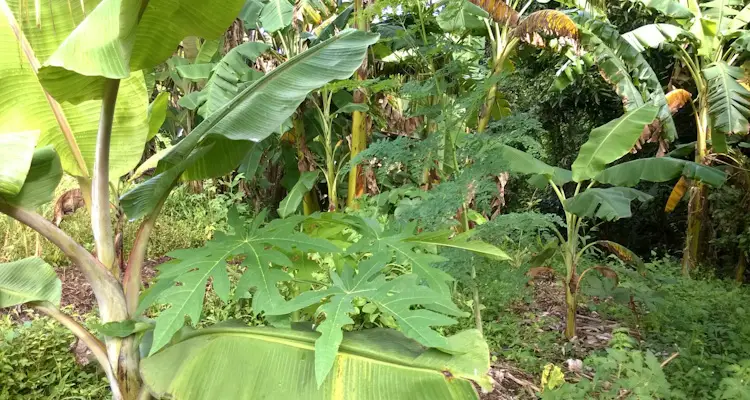
Ideally, you should start with plants that will cause the most disturbance to the soil, for example, bananas.
Take a look at How To Plant Bananas In A Syntropic Garden for detailed instructions.
Plant biomass trees between the seedlings. Ideally, you will sow these directly as seeds; however, you can use seedlings or cuttings.
After planting the seedlings, cover the row in another thin layer of mulch and wet it.
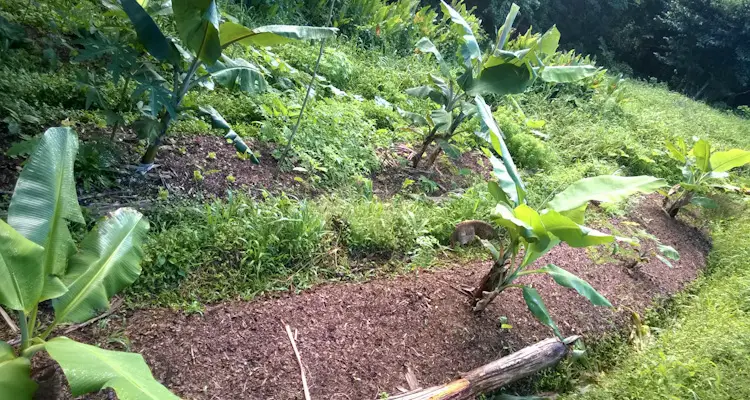
Once complete, you will now have about 18″ on either side to plant other crops.
Use these sections to plant vegetables and other plants in the placenta stratum.
Here is an example of our layout to interplant vegetables in our tree row.
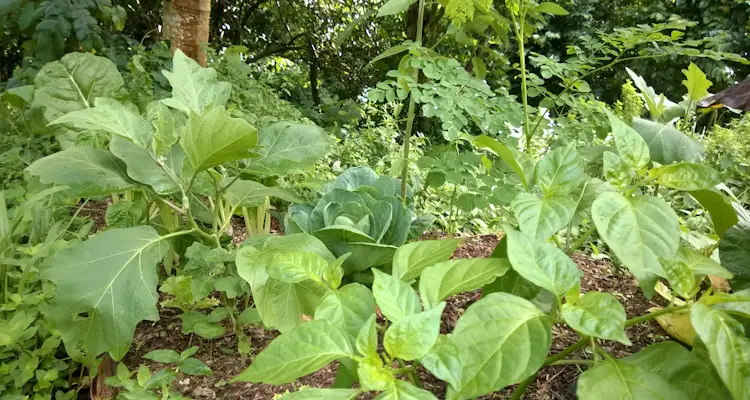
Note: We space the vegetables about 10" inches apart, with neighboring plants occupying different strata levels as in the tree row.
Step 7. Plant Crop Rows
By now, you should be getting the hang of planting based on stratification.
You can plant just about anything your heart desires in this row, vegetables, vines, tubers, herbs, etc.
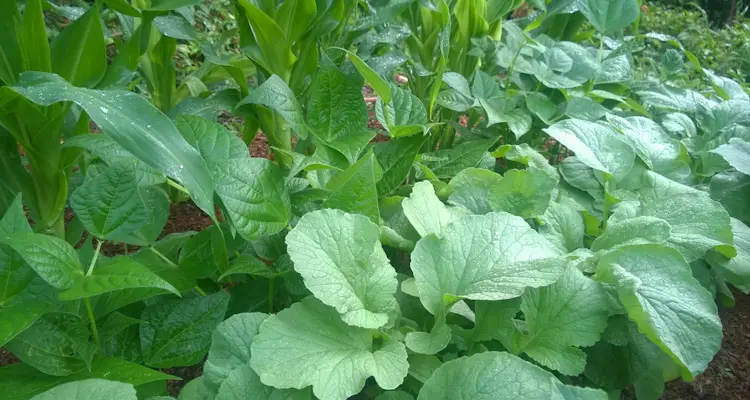
Eventually, you will be able to plant them pretty close, but for now, try to maintain the 10″ spacing, interplanting plants of the different stratum.
As the soil fertility improves, so will the size of your crops. You’ll need to monitor this over time and adjust spacing accordingly.
Ensure that your plants receive enough water, especially during dry spells. As the garden develops, it will not require watering as often.
Based on the crops planted, you can expect to start harvesting vegetables in 3 to 6 weeks.
Step 8. Install Borders and Walkways
While you wait for the plants to grow, it is time to complete the walkways.
Place dry branches, twigs, and logs in direct contact with the soil. Cover the pathways with the vegetation you initially removed.
If you are on a slope, you may wish to create log stairs and trails into the pitch for ease of access.
Note: By now, you might have noticed that the Syntropic Garden's actual design is dictated by the terrain of the land and your choice of trees in the consortium.
Final Thoughts
A Syntropic Garden is an aesthetically pleasing, productive addition to any landscape. It is simple to establish and returns benefits for years to come.
Due to its size, the Syntropic Garden integrates seamlessly into a Micro Farm System, providing a diverse yield of produce beyond that of a typical market garden.
However, the success and enjoyment of the system rely on careful planning, upfront work, and patience, especially in the early days.
Related Questions
Is A Syntropic Garden A Food Forest?
A Syntropic Garden eventually evolves into a food forest. However, it can resemble a market garden in the early stages of its development, yielding various vegetables associated with such.
Can A Syntropic Garden Be Scaled Up?
You can scale up a Syntropic Garden to just about any size you wish. However, in doing so, you will need to adjust the layout of the rows and access paths, resulting in a more uniform appearance associated with Syntropic farming.
References
Agenda Götsch. How to set up our own syntropic design apart from “recipes”? agendagotsch.com. Accessed January 2022
Global Freedom Project. Syntropic Farming Guidebooks. global-freedom-project.org.Accessed January 2022
Adam Nz. Syntropic Agroforestry Resources. adam.nz. Accessed January 2022