
Want to farm on a slope, but not sure how to prepare your land for terraces? Let’s fix that.
In 2018, I started my micro-farm in my backyard.
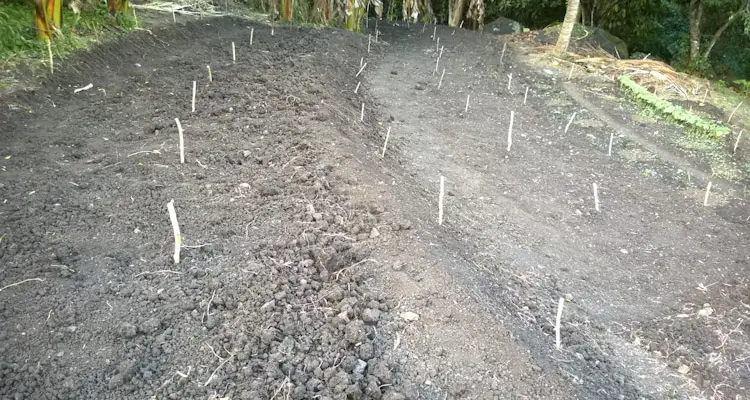
Despite knowing little about constructing terraces, I managed to create 4 in about a month.
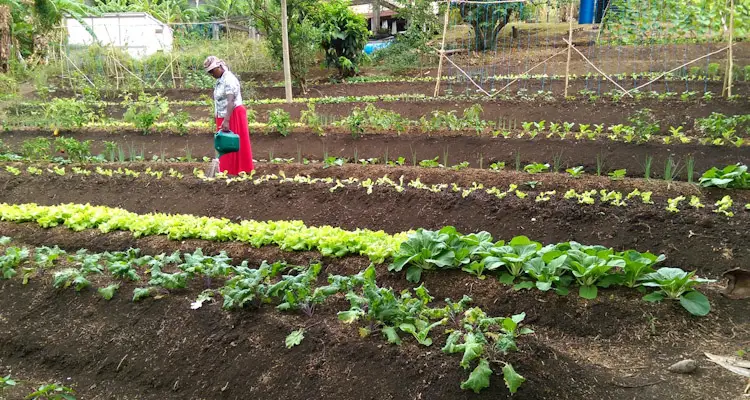
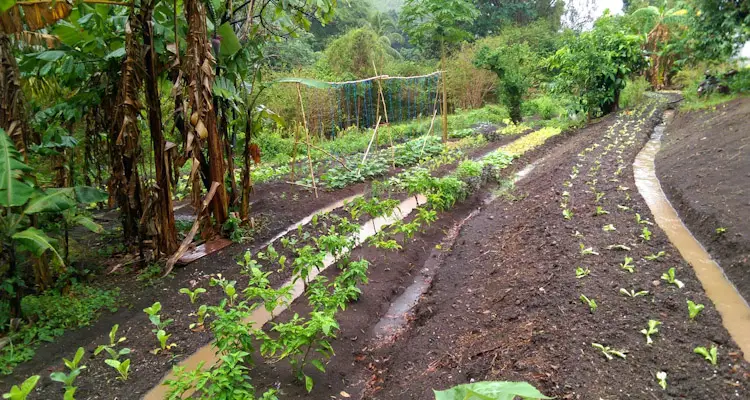
Over the past few years, my backyard has completely transformed into a beautiful, productive terrace garden.
Since then, I’ve learned a lot about designing and building terraces.
And in this post, I’ll share some of the tips I wished I knew when I started terrace farming.
Let’s get to it.
1. Identify And Mark Off Contour Lines On The Slope
Contour lines are the markings on maps that join areas that are the same height above sea level.
Don’t worry. I’m not telling you to get a map. However, you have to find the areas on the slope, which are the same height.
You can use any device that will allow you to find these points. In my case, I used an A-Frame level.
It is the easiest to make and use if you are in a pinch.
However, If you have a large property, use a Surveyor’s level. It will save you a lot of time.
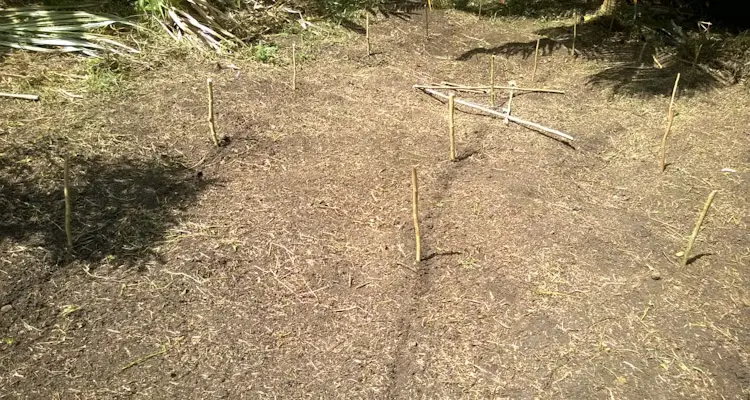
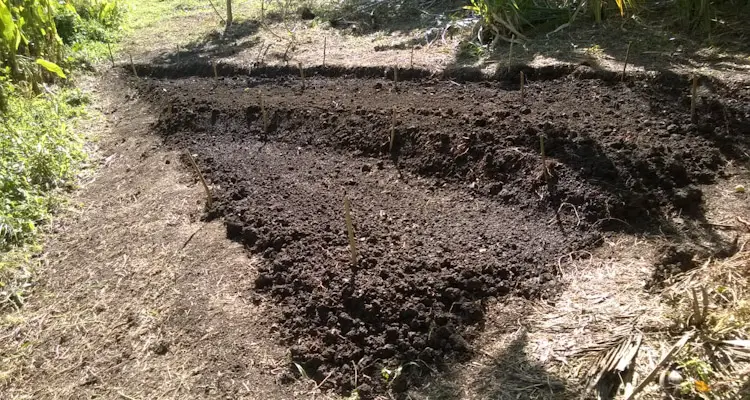
Place markers around 4 to 8 feet apart, at the point you identify as being level. You can use pieces of sticks, stones, or surveyor’s flags, if available.
After you place the markers, draw a line to connect them. You don’t need to get fancy.
You should smooth the line out if there are too many sharp points.
2. Cut A Drain Along Top Contour Of The Planting Area
One of the main reasons for creating terraces along a slope is to prevent excessive soil erosion.
However, the soil is loosened and exposed while preparing terraces.
Depending on the steepness of the slope, this is a recipe for disaster if it rains.
You should create a drain to remove excess water as a precaution.
This head drain has to be deep and wide enough to handle the runoff from uphill.
- You should dig the head drain along the contour to ensure that it is relatively level. Over time grass or pebbles can be used to protect the soil.
- It should be about 18 inches deep and 24 inches wide. Place the soil you removed on the underside to form a mound.
- The ends can be shallower than the depth of the drain to allow some water to remain for a while. This water will slowly soak into the soil.
Ideally, this drain will empty the water into a storm drain at the sides of the planting area.
By creating this drain, you will interrupt the flow of water. The water collected by the drain will slowly sink into the soil over time.
3. Determine The Type Of Soil In The Area
The height of your terraces will be affected quite a bit based on the type of soil.
There are two characteristics you need to keep in mind.
If your soil naturally clumps together or forms huge cracks when dry, chances are it is clayey.
Clayey soil is usually hard to cultivate. However, it is perfect for creating terraces (even over 3 feet).
On the other hand, if your soil is loose, easy to till, and crumples easily, you possibly have sandy soil.
Keep these terraces under 2 feet.
Ideally, you should have some sort of structure to keep this soil type in place.
Usually, you will find a mixture of both. So, do not worry too much.
Just keep in mind that, regardless of the type of soil, the terrace will settle over time; when exposed to the weather.
Don’t worry about this if you are going to build retaining walls anyway.
4. Follow the 2:1 Rule Especially If No Retaining Wall Is To Be Used
What happens when you try to make a mound of soil? It starts to slide off the sides, forming a bit of a slope as you go higher.
When measured, this slope is usually around half the distance of the height of the mound.
Keep this in mind when planning your terrace.
For example: If you plan to build a terrace that will be 2 feet tall, allow at least 1 foot for the riser. This space will be enough to form the gentle slope.
If you ignore the 2:1 rule and create a steep-sided terrace without anything in place to retain it, nature will correct this through erosion.
I must point out that even when you follow this rule, you will get some erosion as the soil settles itself. It can take up to a year.
5. Plant Vetiver Grass Or Other Clumping Vegetation On Risers
One of the main reasons to create terraces on a slope is to prevent or lessen soil erosion. However, if risers are left bare or exposed, they are eroded whenever there is a downpour.
To lessen this, you can plant some type of vegetation on the risers. Ideally, it will be a perennial plant with fibrous roots that provides ground cover.
The perfect plant for this purpose is Vetiver grass. It is a clumping grass with powerful roots: which grow vertically. These roots do not compete with neighboring plants.
If you do not have access to Vetiver grass, lemongrass, or other clumping vegetation will work.
You can also use cover crops such as Rye. However, I have noticed that if you simply leave the area alone, wild grass will sprout within a few days.

Initially, I used to cut this wild grass and try to plant other crops such as okra, beans, peppers, and even eggplants.
However, I realized that the wild grass was doing more good than I was aware. Its roots protect the soil, and flowers attract pollinators and beneficial insects.
6. Leave Enough Space For Access Planting and Drainage
When planning, you need to ensure that you have enough space between contour lines to build the terrace.
Ideally, you will need 10 to 12 feet between lines, but don’t worry when the lines start to get closer.
The lines will narrow when there is an increase in the slope.
You have to account for the following.
- The riser – This is the slope on the lower side of the terrace. Based on the height, it can take up about 2 to 3 feet.
- The walkway – You need to have a wide enough area to access the planting area. It can be as narrow as 18 inches to as much as 30 inches if you intend to use a small wheelbarrow.
- The beds – Keep beds between 36 and 48 inches. This width will allow easy access to plants without having to walk onto the beds.
- Divergence drain – This drain is on the inner side of the terrace. It also acts as a secondary pathway. It can be about 18 inches wide and 12 inches deep.
These four parts add up to about 10 feet. You can increase the width to suit your needs and the gradient of the slope.
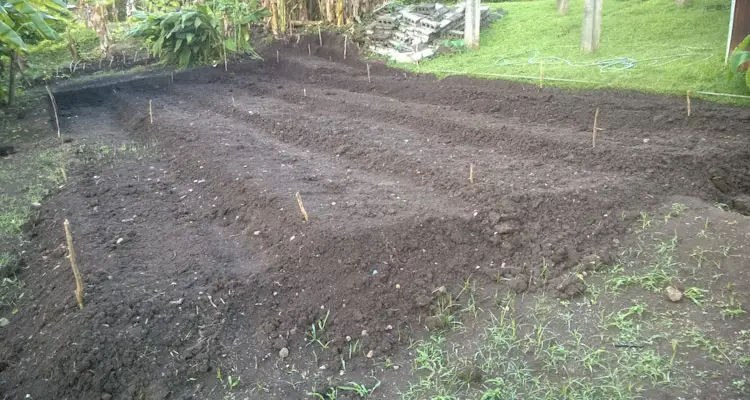
7. Allow Soil To Settle Before Preparing Beds On Terraces
You should wait about two weeks to allow the terrace to get a bit weathered.
During this time, finer soil will erode from the risers. You can scoop this up and place it onto the beds.
The terrace will start to smooth out as clumps of soil break down.
You can help this process along by moistening the soil as much as possible.
I usually sprinkle and rake the soil on the beds a few times to help break up the clumps if there is no rain.
Walk along the pathways to help compress the soil, weather permitting. Do not attempt this if there is a downpour.
This process can be a bit time-consuming but will help in the long run.
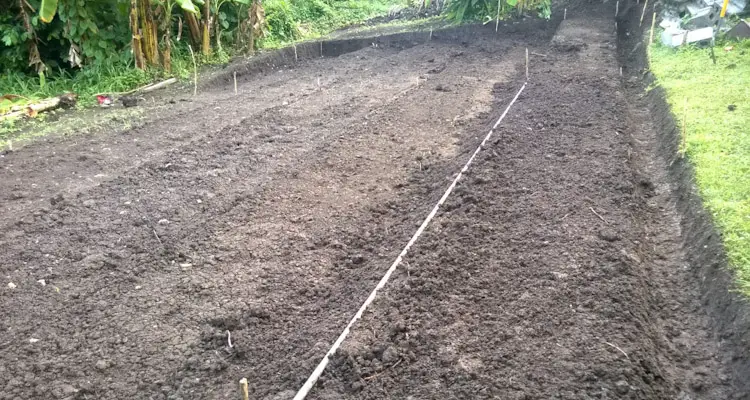
8. Cut Contour Drains On Slope Where You Intend To Start Terrace
An easy way to shape the terraces is to cut a drain along the contour line. You should place the soil you removed under the drain.
These drains will serve three purposes.
- In case of rain, they will check the flow of water and lessen soil erosion.
- They will become divergence drains later.
- They form an easy starting point to shape the terraces.
The top two purposes do not need further explanation.
However, it can be easy to miss the third purpose.
Think of it. What did you do with the soil after you dug the drain?
You dumped it beneath the drain.
What would you have to do to widen the drain?
Gradually dig away at the lower side of the drain, dumping the soil further down the slope.
If you keep at this, you would have formed a narrow platform.
At this point, you simply dig the drain a bit and gradually widen it as you widen the platform.
When you reach the final width of the terrace, dig the drain one last time to create the divergence drain. Spread the soil.
9. Start Shaping Terrace From The Bottom Of the Slope
I learned this lesson the hard way. It is much easier to start digging the terraces from the bottom.
The only exception to this is if you intend to use a tractor with imported topsoil.
However, when using hand tools and only the existing soil, you have to take a bottoms-up approach.
You can do this by cutting into the slope and moving the soil downwards. Repeat this until the terrace is level, with the riser sloping towards the lower contour line.
After you finish the first terrace, move up the slope and repeat.
Initially, I was not aware of this approach and had to manually carry tons of soil from one part of the terrace to fill others.
It was time-consuming!
I was going against the grain by using this method.
Keep it simple. Start from the bottom.
Final Thoughts
Don’t forget: the soil on the terrace can take up to a year to settle. During this time, you will be able to use it, but don’t worry if there is some erosion.
And lastly, you can plant a cover crop over the entire terrace while it settles. These plants help to bind the soil and protect the surface from erosion.
Preparing land for terrace farming is hard work. You need to figure out contours, plan, dig, then dig some more.
The good news is: you are not alone.
Many farmers (like me) have done the work before and are willing to share what we have learned from our experiences.
It’s all up to you to use these tips and get to work now.
References
FAO. Bench Terraces. FAO.org. Accessed July 2021