
Did you know that it’s possible to raise chickens for meat without chemicals, hormones, or overcrowded housing?
In fact, by raising chickens at home, you can ensure they receive a diverse diet, and grow up in a clean, healthy environment.
Is this the way you’d like to raise your chickens? Then, read on…
In this guide, I will explain how to raise chickens for meat following the simple method we use on our micro-farm.
But first, let’s ensure we understand which types of chickens are best suited for this purpose.
Selecting the Right Breed
Chickens are bred for two main reasons: meat and eggs. However, for this article, we’ll focus on meat birds, which are also called broilers.
Cornish Cross is by far the most popular meat chicken. It’s a hybrid of Cornish and White Rock chickens, which can go from hatch to harvest in about 6 weeks.
Of course, there are dual-purpose breeds like Rhode Island Red, suitable for meat and laying eggs. But for the sake of this guide, we’ll focus on Cornish Cross since it is the most widely available meat breed at the moment.
Setting Up the Coop and Equipment
Now that you know what kind of chickens you need, it’s time to set up a safe, comfortable home for them.
When building your chicken coop, ensure it’s easy to access, well-ventilated, and has enough light, preferably natural. However, ensure it is protected from direct sunlight.
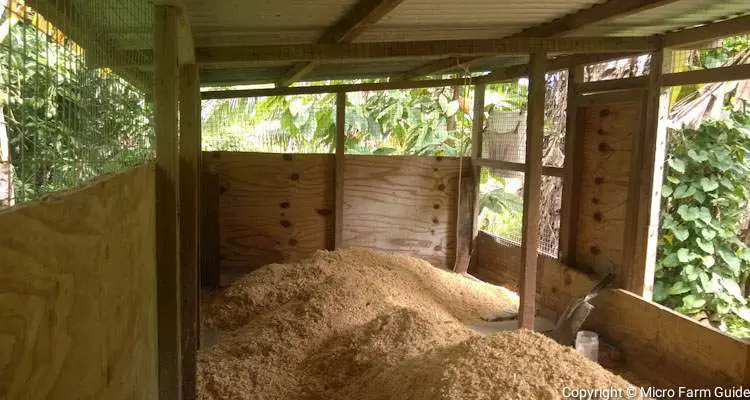
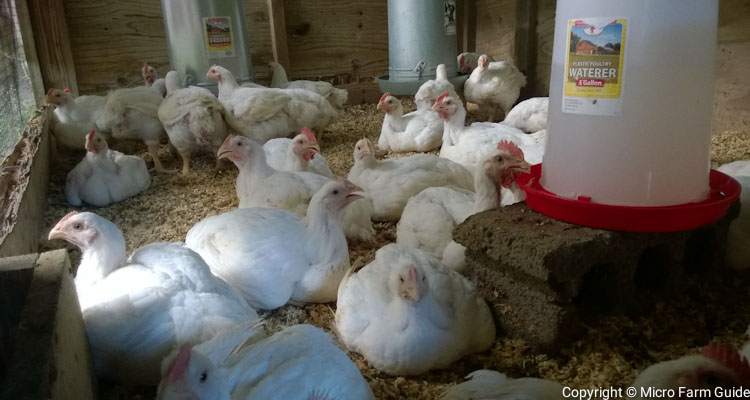
The recommended space for a broiler is 1 square foot per bird. However, I prefer to provide at least 3 times this amount, which gives the chickens enough space to exercise and makes tasks such as turning the litter a breeze.
You can use dirt, sand, rice husk, or shaving for the flooring. I prefer covering the coop floor with 6 to 12 inches of wood shaving. This deep litter makes it easier to control odors and keep the coop dry.
The actual design of the coop will differ based on your climate. For example, here in the tropics, the main concerns are rain, heat, and predators.
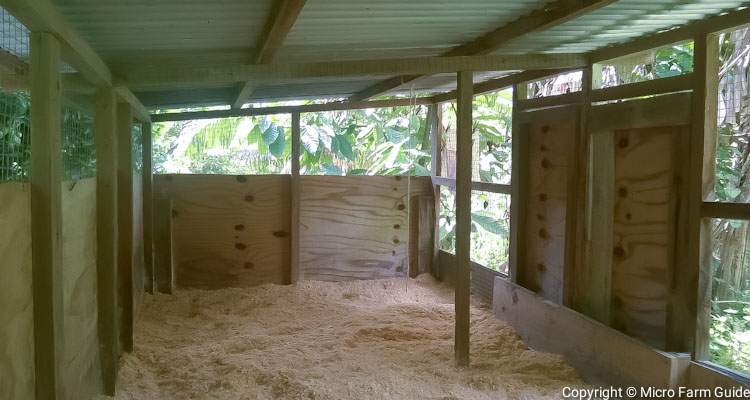
For example, we chose a simple coop with “chicken wire” side walls to allow ventilation while offering protection from multiple threats.
You will also need to get some equipment and materials. Here is a list to get you started:
| Items | Details |
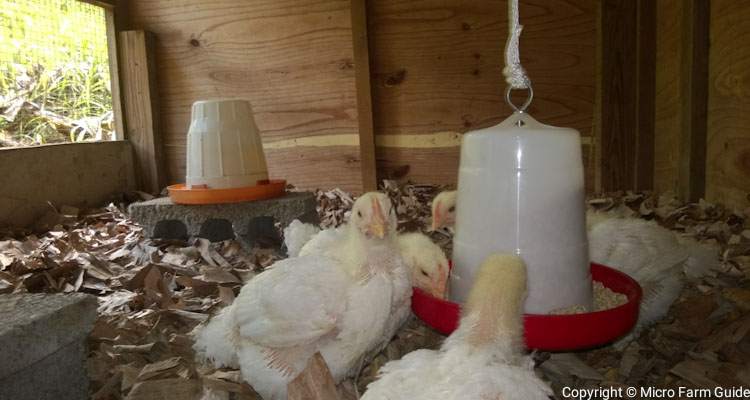
| Feeders | Tray feeders for chicks and hanging feeders for grown chickens. |
| Waterers | 1-gallon waterers or automatic systems |
| String & Rope | To hang feeders, waterers, and wild grass |
| Wood Shaving Or Sawdust | Preferably from untreated wood so it can be used as compost afterward. |
| Thermometer | To monitor the temperature inside the coop |
| Tarpaulin | To cover the sides of coop during intense rainfall. |
| Heating Lamp | Used to provide warmth for chicks in colder regions. |
Once all this is prepared, it’s time for the fun part: raising your chicken. I want to make this easy, so I’ve included some of my notes and observations. Let’s dive in!
Feeding and Nutrition
Like us, chickens need to have a balanced diet to ensure they get the nutrients they need to grow.
They enjoy eating seeds, grains, grass, insects, vegetables, and more. However, store-bought chicken food, whether conventional or organic, gives them the best chance to receive the balanced diet they need.
Usually, you’ll have to purchase about 15 Lbs of Broiler Starter and 50 Lbs of Broiler Finisher for every 6 chickens you intend to grow.
I also like to supplement this feed with fruits, vegetables, wild grass, worms, insects, and kitchen scraps.
Additionally, chickens can’t afford to get dehydrated, especially after week 4. So, make sure they always have a continuous supply of fresh water.
You can add garlic, aloe vera, fresh lemon juice, or raw vinegar to the water to help boost their immune system.
Also, remember to change the water daily to prevent the growth of harmful microorganisms.
Health and Disease Management
Broilers grow really fastand can be plagued by several health issues if not managed properly.
Thankfully, you can avoid most issues by keeping the coop clean, well-ventilated, and providing easy access to food and water daily.
However, you must monitor your chicks for signs of injury or sickness, such as runny nose, limping, discomfort, sneezing, or other abnormal behaviors.

If you notice a chicken is unwell, isolate them from the others. It prevents possible illness from spreading and keeps them safe from bullying.
Raising Chickens: Week By Week Breakdown
To begin, you will most likely order your broiler chicks from a hatchery via a local agent. They will come to you as “day-old chicks.” While you wait for them to arrive, you’ll need to:
Day 0: Prepare The Coop
First, clean and disinfect the coop using a mild detergent like bleach, vinegar, or Lactic Acid Bacteria solution.
Then, prepare your coop by filling it with fresh bedding — partitioning off a small section for “brooding.”
Place newspaper over the bedding, then add a waterer and tray feeders inside before you collect the chicks.
Day-old chicks prefer temperatures around 95°F, but can tolerate less. So, ensure you do what is necessary to keep the chicks warm. If the temperature is too cold, they will huddle together, which could result in suffocation.
This might mean simply blocking off the sides of the coop to prevent chilly drafts in hot climates or installing a warming light if the temperature is under 85°F.
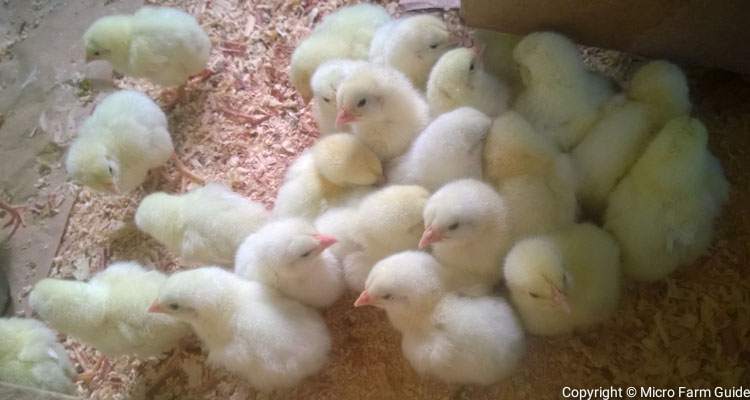
Day 1 to 7: Welcoming Your Chicks
Your day-old chicks will arrive in a box. They are usually lively but easily frightened. So before you introduce them to the coop, fill the feeder tray with a starter mix and sprinkle some brown rice grains on the newspaper.
I usually mix some glucose or honey with their water for the first day or two. This is not a must, but it seems to give them some energy boost.
Then, carry your box of chicks to the coop. Take them out of the box and introduce them, one by one, to their new home, dipping their beak briefly into the waterer.
Once all the chicks are out, please close the door and allow them to get accustomed to their new environment. Remember to keep your baby chicks warm.
As evening approaches, they will start to make noise as it gets dark. Some people choose to use light, but it’s not necessary, except in cold climates, where light is provided by the heating lamp.
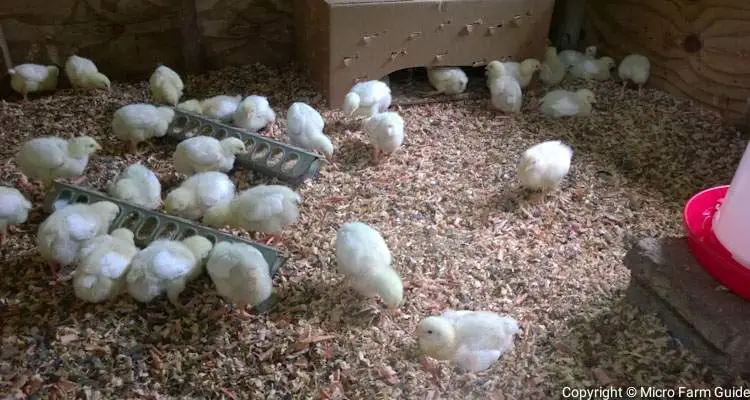
Don’t worry if you see the chicks snuggle into small groups to sleep. That is normal. However, if they try to form one large group, they are most likely feeling cold. I’ve lost a chick or two who got flattened overnight.
So, monitor your chicks daily for signs of sickness or discomfort. Little chicks are usually very active, so limping or slow movement are signs that something is wrong.
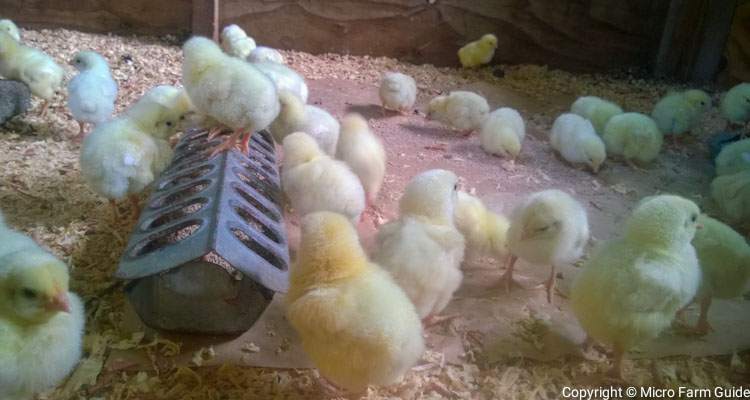
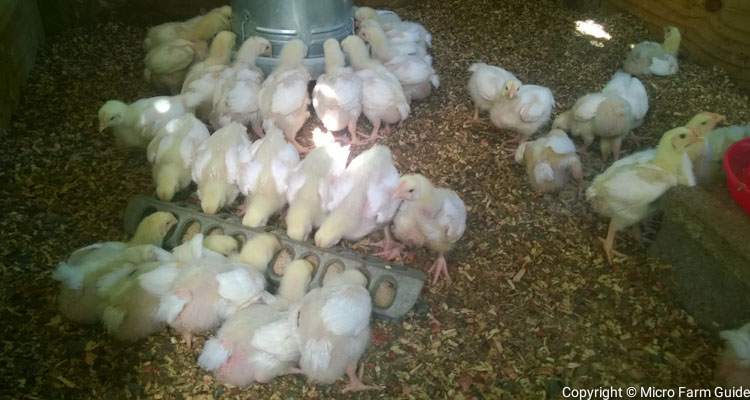
Week 2 to 3: Growing Feathers
The chicks will become increasingly more active and curious as they get older. Some may even take flight, and one or two will try to fight!
As they grow, consider lowering the temperature by at least 5°F per week and increasing the partition space if possible.
Keep an eye out for any signs of sickness or injury. They’re still young and somewhat adventurous. As a result, they tend to get into trouble every now and then.
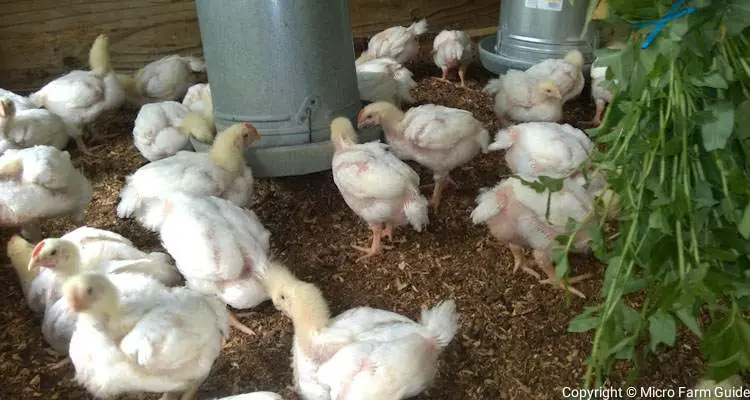
This is also an excellent time to supplement their diet with fruits, vegetables, kitchen scraps, and wild grasses for extra nutrients. The trick is to introduce these “greens” as a treat, and they will look forward to it every day.
Week 4: Cross Over To “Adult” Feed
Broilers grow fast! Around week 3.5 you’ll need to start feeding them either a grower or finisher ration. This “adult feed” is usually available as pellets or whole grain and has the required nutrients to support their rapid growth.
During this periodLook for signs of heat stress, like panting or excessive moisture in the coop.
Proper ventilation and clean water are critical to keep your chicks healthy as their metabolism heats them up.
You will need to turn the bedding daily to prevent ammonia build-uep your chickens active.
Week 5 to 7 Adolescence
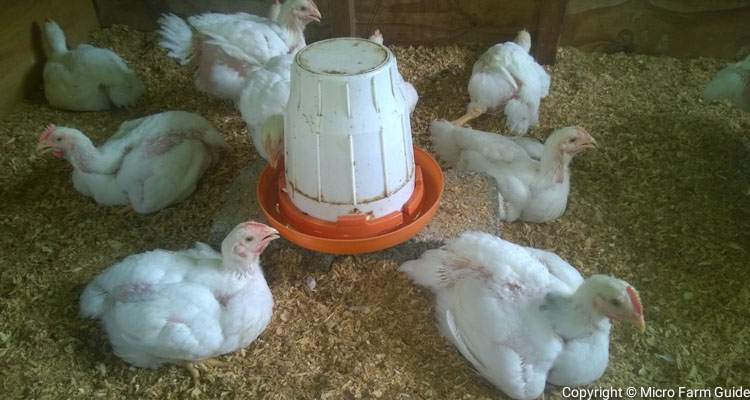
By week 5, your chicks will resemble full-grown fowls… In other words, they will be large. However, don’t worry if some of their feathers have not grown in completely.
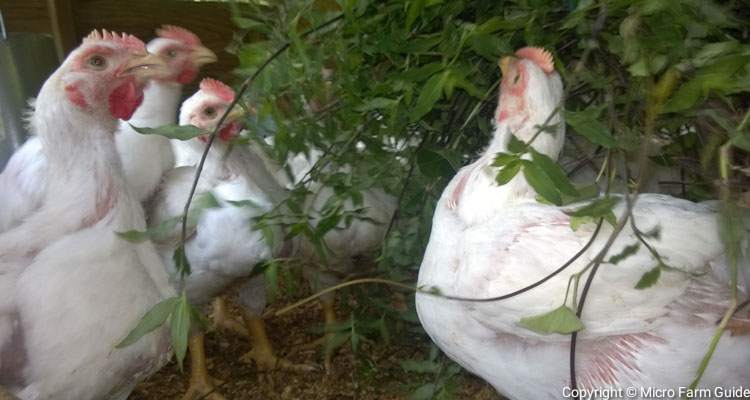
Also, it’s entirely normal if your chickens become less active due to their size. Yet, if they had enough space initially, they should be a bit more active than the “industry standard.”
For instance, my chickens usually spend the day walking around, “sizing” each other up as if marking territory. It’s entertaining to say the least.
That said, please keep a close eye on your chickens for signs of heat stress or breathing difficulty from ammonia build-up.
A clean, well-ventilated coop is essential during this time.
By the end of this phase, your chickens are ready for harvest. So, let’s take a quick look at the process, for now. We’ll
Harvesting, Processing, and Butchering Meat Chickens
Broilers are ready for harvest starting from week 6, but you can keep them as long as you wish.
You’ll need some tools for butchering, such as sharp knives, a slaughter cone, buckets, a plucker, a large pot or scalder, a thermometer, a hose, and a chill tank or a large bucket for ice.

- Chickens are usually harvested by placing them in a slaughter cone and skillfully cutting off their heads, resulting in instant death. The blood is then drained.
- Next, the chicken is dipped into hot water to loosen their feathers and then plucked.
- Afterward, the chicken is cut open, cleaned, and packaged in freezer-safe plastics for long-term storage.
Of course, this is just a summary. You can learn the entire harvesting and evisceration process in our step by step guide.
Final Thoughts
Thank you for taking the time to read our beginner’s guide to raising chickens for meat.
We’ve covered all the essential steps you need to know, from selecting the right chickens to butchering them humanely.
The taste and quality of homegrown chickens are something to look forward to, and the savings on your grocery bills will make you smile.
If you have any questions or need more tips, please reach out via our contact form. Plus you can visit our Natural Farming Page for additional information and expert guidance.
Related Questions
1. Is it worth raising meat chickens?
Yes, raising meat chickens is worth it. It’s short term and allows you to save on groceries while enjoying healthy, tasty, fresh meat at home.
2. What is the best chicken to raise for meat?
The Cornish Cross is a great choice. They grow fast, are quiet, and produce delicious meat.
3. How old should a chicken be to butcher?
A broiler chicken is usually butchered at 6 to 7 weeks old. However, this time can differ based on the breed and the intended use. For example, “roasters” are harvested about 3 to 5 months old.
4. What are chickens raised for meat called?
Most chickens raised for meat are called “broilers.” However, there are several other names given to meat chickens based on age and intended use. For example, “Capons” are male chickens about 16 weeks to 8 months old.
References
UMN Extension. Raising Chickens For Meat. extension.umn.edu. Accessed October 2023
Extension. Raising Meat Chickens In Small Or Backyard Flocks. poultry.extension.org. Accessed October 2023