
Do you want the simplest way to make tasty, homemade vinegar from just about any fruit? The “secret” is to carry out two distinct fermentation processes, allowing the first to complete before starting the second.
This is the method I use to make an assortment of vinegar from various fruits, including Banana and Pineapple, with slight adjustments to make Brown Rice Vinegar.
We are forever enhancing the process to produce the best-tasting vinegar for personal use and commercial sales. We hope that this little guide will serve as a helpful introduction to the fascinating world of vinegar making.

In this post, I’ll guide you through our seven-step process of making delicious vinegar from scratch and answer some common questions related to the process.
Let’s get brewing!
Note: I must emphasize that a solution needs to go through two different types of fermentation to become vinegar; Alcoholic, which does not require oxygen, and Acetic, which does. While it is possible to do both simultaneously, it is best practice to carry each process out individually.
List Of Materials Needed To Make Vinegar At Home
Here is a list of materials and equipment you’ll need to make vinegar using whole fruits or leftovers. I’ve included the measurements to make a small batch using 1 lb of fruit. Adjust these measurements based on your equipment and the amount of fruit you intend to use.
| Items | Details |
| 1 Lb Fruits Or Fruit Scraps | Use Well ripened fruit |
| ½ Lb Brown Sugar | Use less sugar for whole fruit |
| 1 Liter Filtered Water | Boiled water can be used instead |
| 2 Tbsp. Apple Cider Vinegar | Use Mother of Vinegar or Scoby if available |
| Kitchen Scale | Either analog or digital will work |
| 2 Liters Wide Mouth Bottle | Preferably a glass jar with a lid |
| 1 ½ Liter Wide-Mouth Bottle | Preferably glass, but a plastic bottle will work |
| Paper Towel | Avoid cloth towels if possible |
| String Or Rubber Band | To secure paper towel around bottle mouth |
| Narrow Mouth Bottles | To store the finished vinegar |
| Acidity Tester | To confirm acidity |
| Funnel And Strainer | Preferable cheesecloth or plastic mesh |
| Wine Yeast (Optional) | To assist with alcoholic fermentation |
Note: The primary aim of your first batch of vinegar is to gain experience. You're also trying to cultivate a thick Scoby layer, which will be used to accelerate future vinegar production. As a result, it would be better to make several small batches until you get the hang of it.
Step 1: Collect And Sterilize Equipment
The vinegar-making process uses specific microorganisms and can spoil if the solution becomes contaminated.
As a result, you must ensure that you sterilize your equipment correctly before using it to avoid introducing any unwanted microbes into the process.
Wash equipment thoroughly using mild soap and water. Then submerge metal and glass utensils in boiling water. You can use strong alcohol to sterilize plastic containers and then allow them to air-dry.
Step 2: Clean, Cut, And Prepare Fruits
While your equipment is drying, it is time to prepare your fruit. You should use well-ripened fruit. Choose beginner-friendly fruits such as Pineapple, Apples, Grapes, and Carambola. These fruits are high in sugar and easy to ferment.
Thoroughly rinse the skins of the fruit. Remove any visible dirt and soak to remove possible chemical residue. Discard any materials with signs of spoilage.
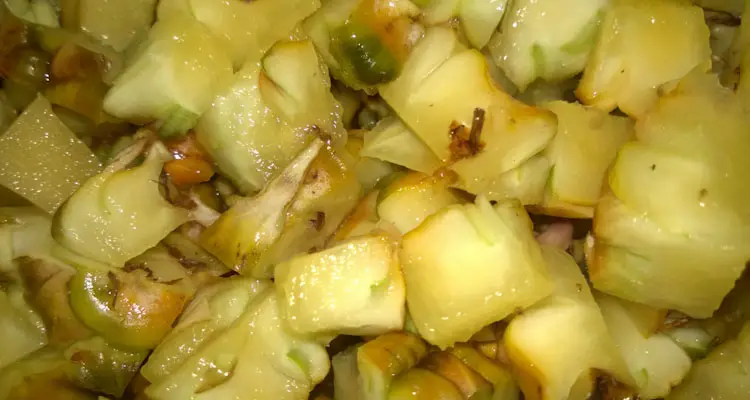
It is best to use the entire fruit for your first batch or until you get the hang of the process. Cut the fruits into small pieces, then move on to the next step.
Note: You can use a juicer to extract the fruit juice from the pulp. However, this is not necessary but can save you some sugar.
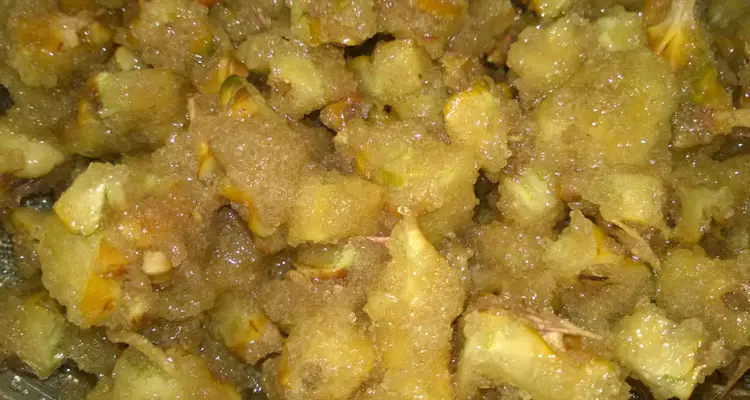
Step 3: Start Alcoholic Fermentation
Weight the fruits and add the sugar to the container, mixing until the sugar becomes like a syrup. Pour the mixture into the wider mouth bottle, cover with the lid and place it in a cool dark area.
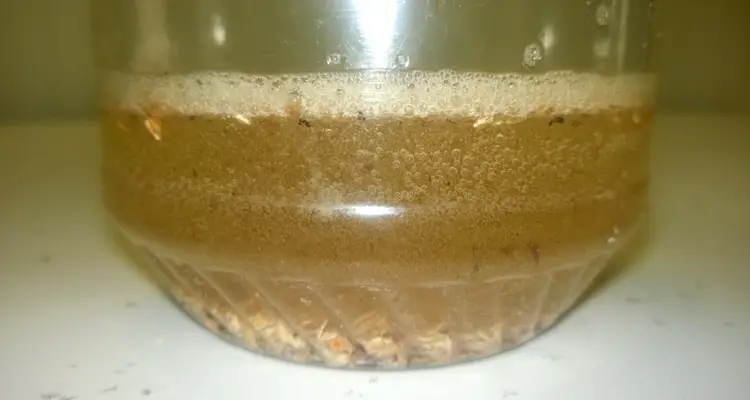
Stir the solution daily. You will notice bubbles forming in the solution after about 2 to 5 days. This is proof that fermentation has begun.
Add water to the solution, stir and close the lid. Typically, I add about twice the volume of the solution if additional sugar is used, a practice I borrowed from making KNF Fermented Fruit Juice. Return to a dark area, remove once daily to stir.
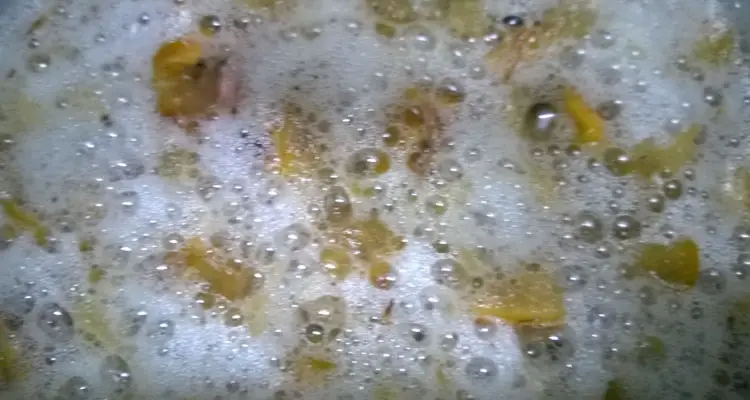
Fermentation can take between 14 and 21 days to complete. Monitor the bubble production for evidence of microbial activity. Once you no longer notice new bubbles, stir the solution and wait another day before moving to the next step.
Note: Stirring keeps the solid material submerged and prevents the formation of mold or other fungi. However, do not open the bottle unnecessarily.
Step 4: Start Acetic Fermentation
Now that the primary alcoholic fermentation process is complete, it’s time to prepare for acetic fermentation.
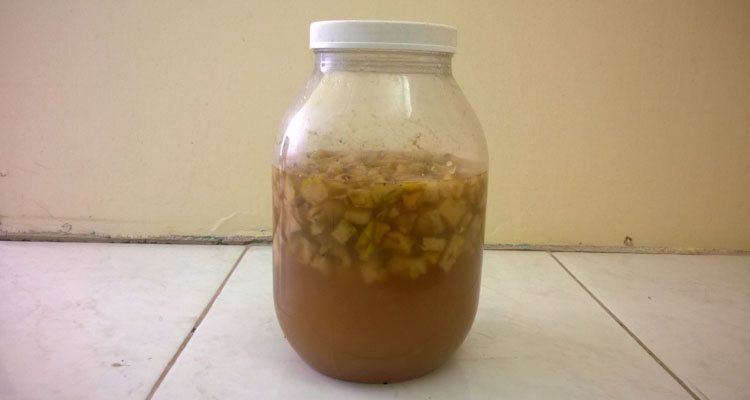
Pour the solution into another wide-mouth bottle, using a strainer or cheesecloth to remove large solid chunks. Leave about 1 to 2 inches free from the top. You should be able to use a smaller bottle without the fruit material.
Add 2 to 4 tbsp of Apple Cider Vinegar, with the mother, to the solution. Alternatively, if you have access to Vinegar Scoby, you can add a large piece instead.
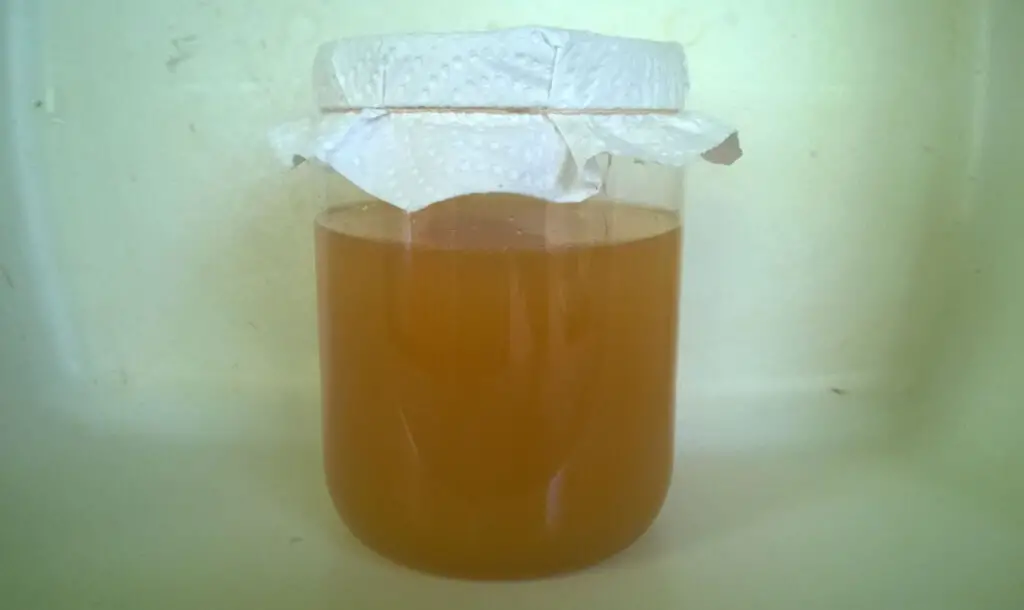
Cover the bottle’s mouth with a sheet of tissue paper and secure it with the string. Then place the bottle in a cool dark area, where it can remain undisturbed for the next few months.
Acetic fermentation can take 1 to 4 months, depending on the solution’s temperature and the amount of Acetobacter present. Also, remember that warm temperatures stimulate microbial activity, shortening the fermentation process’s duration.
Note: You can carry out acetic fermentation with the fruit solids. However, separating the Vinegar SCOBY from the fruit solids can be a pain. Besides, the debris can look unsightly after a few weeks of floating in the solution. Don't ask me how I know…
Step 5: Measure Acidity Using PH Tester
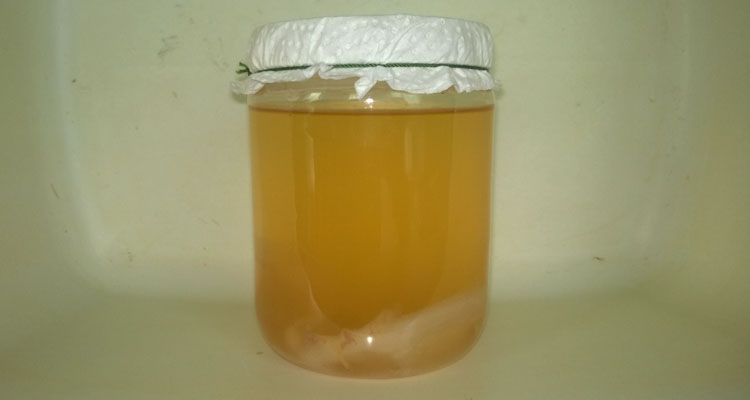
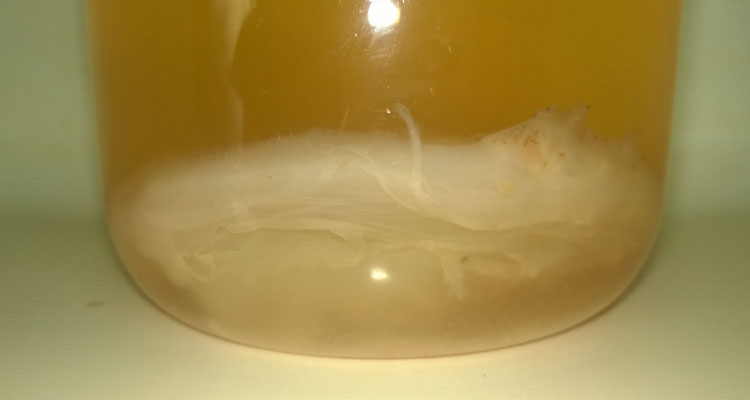
As the weeks go by, you will notice a thin gel-like layer form on the solution’s surface, which will continue to thicken over time. This is the Vinegar Scoby, usually accompanied by a faint Vinegar aroma. This does NOT mean that the vinegar is ready.
The only way to confirm that vinegar is ready for consumption is to do an acidity test. You can use either a litmus paper or a digital PH meter. Vinegar should have a PH reading of 3.5 or lower, which means it is acidic.
Once the PH is confirmed, you can proceed to the long-awaited taste test! Your vinegar is ready. Congratulations! Now it’s time to bottle and store it safely.
Step 6: Separate And Bottle Vinegar
Now that your vinegar is ready, you should see at least three distinct layers within the solution: Vinegar Scoby at the top, Clear liquid in the middle, which sometime will have Scoby discs that fell into the solution, and sediments at the bottom, remnants of dead bacteria.
Remove the Floating Vinegar Scoby disc from the mouth of the bottle. Don’t worry if it falls when you touch the bottle. Then slowly pour the clear liquid into a narrow mouth bottle, careful not to allow any solid material to get into the bottle.
Cover the narrow-mouth bottle immediately and place it in a cool dark place for storage. Open the bottle only when necessary, closing it as soon as you’re done. Ensure the completed vinegar gets as little exposure to direct sunlight or oxygen as possible.
Step 7: Store Vinegar Scoby
The vinegar SCOBY, Symbiotic Culture Of Bacteria And Yeast, is the gel-like disc that forms on the solution’s surface and often falls into the solution if disturbed. It contains both the yeast for alcoholic fermentation and the acetic acid bacteria, also known as the mother of vinegar.
To safely store the Vinegar Scoby, remove the gelatinous disc from the vinegar solution and place it into a clean bottle. Pour enough vinegar into the bottle to cover the Scoby. Then close tightly to prevent air from entering the bottle. This will cause the microorganisms in the Scoby to go dormant until needed.
You can use just about any vinegar, including distilled White Vinegar, to preserve the Scoby. Ensure that you remember to refresh the solution every 2 to 3 months to keep the Scoby healthy.
What Are The Benefits Of Vinegar?
In recent years, vinegar’s popularity reignited with everyone from celebrity chefs to doctors promoting its numerous culinary and health benefits. Most of these benefits are attributed to raw, unrefined vinegar, which studies confirm to be high in antioxidants and acts as a probiotic.
Vinegar reportedly aids in digestion and the general health of the digestive tract. As a result, it has been shown to assist in weight loss, cholesterol, and several other food-related issues.
Studies suggest that vinegar can assist in regulating blood sugar and pressure, potentially enhancing the body’s ability to fight against diseases.
The active ingredient in vinegar, acetic acid, has anti-bacterial and anti-fungal properties, making it a safer alternative to harsh cleaning agents.
While specific vinegar may have unique benefits based on the source material, it was found that most support a healthy immune system.
See Also: 10 Uncommon Ways To Use Vinegar In The Home And Garden
Are There Any Disadvantages To Using Vinegar?
While vinegar undoubtedly has numerous health and nutritional benefits, you should be aware of the following drawbacks.
First and foremost, vinegar is an acidic solution that can damage your teeth’s enamel if misused or too often. Remember, weakened tooth enamel can lead to cavities. As a result, it is advised to diluted vinegar and use a straw, if possible, to minimize its effects.
Secondly, vinegar can lower blood sugar to dangerously low levels if overused, resulting in symptoms such as dizziness. As a result, you should consult a physician if you intend to use vinegar for its health benefits, especially if you have diabetes.
As you might have noticed, these disadvantages are directly linked to the imported use of the solution and can easily be avoided. Please be guided accordingly.
Final Thoughts
Making homemade vinegar is a simple but lengthy process. However, it allows you to use various ingredients that might have ended up in the trash.
It is a rewarding process, developing new flavors and experimenting with methods. Most importantly, it provides many culinary, nutritional, and health benefits.
Of course, you can make this process even more efficient by using specialized tools and inputs. However, it’s best to try it out first to see if you enjoy it. Chances are you’ll be a wine and vinegar-making pro in no time.
Related Questions
What Is Vinegar Made Of?
Vinegar is primarily a dilute acetic acid solution made from the oxidation of ethanol by acetic acid bacteria, commonly referred to as Acetobacter. It draws its flavor from the ingredient from which the original alcohol was made and is used for various purposes.
References
Institute Of Culinary Education. How To Make Vinegar From Home. ice.edu. Accessed July 2022
National Library Of Medicine. Varieties, production, composition and health benefits of vinegar: A review. pubmed.ncbi.nlm.nih.gov. Accessed July 2022
Medscape General Medicine. Vinegar: Medicinal Uses and Antiglycemic Effect. ncbi.nlm.nih.gov. Accessed July 2022
Glen And Friends Cooking. How To Store The Vinegar Mother. [Video] YouTube. Uploaded September 17, 2018